HTML Classes
Class Attribute in HTML
The HTML class attribute is used to specify a single or multiple class names for an HTML element. The class name can be used by CSS and JavaScript to do some tasks for HTML elements.
To create a class; write a period (.) character, followed by a class name. Then, define the CSS properties within curly braces :
Using The class Attribute
The class attribute is often used to point to a class name in a style sheet. It can also be used by a JavaScript to access and manipulate elements with the specific class name.
Example:
<!DOCTYPE html>
<html>
<head>
<style>
.headings{
color: lightgreen;
font-family: cursive;
background-color: black; }
</style>
</head>
<body>
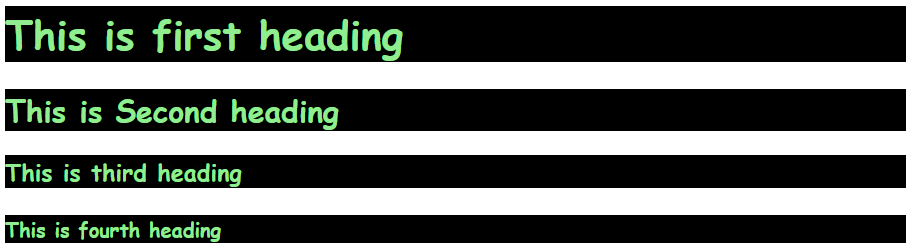
<h1 class="headings">This is first heading</h1>
<h2 class="headings">This is Second heading</h2>
<h3 class="headings">This is third heading</h3>
<h4 class="headings">This is fourth heading</h4>
</body>
</html>
Output:
You can use class attribute on any HTML element.
The class name is case-sensitive
Multiple Classes
HTML elements can belong to more than one class.
To define multiple classes, separate the class names with a space, e.g. <div class="city main">. The element will be styled according to all the classes specified.
In the following example, the first <h2> element belongs to both the city class and also to the main class, and will get the CSS styles from both of the classes:
<!DOCTYPE html>
<html>
	<head>
		<style>
			.city {
			  background-color: tomato;
			  color: white;
			  padding: 10px;
			}

			.main {
			  text-align: center;
			}
		</style>
	</head>
	<body>
		<h2 class="city main">Rome</h2>
		<h2 class="city">Venice</h2>
		<h2 class="city">Turin</h2>
	</body>
</html>

Different Elements Can Share Same Class
Different HTML elements can point to the same class name.
<!DOCTYPE html>
<html>
<head>
<style>
.fruit {
background-color: orange;
color: white;
padding: 10px;
}
</style>
</head>
<body>
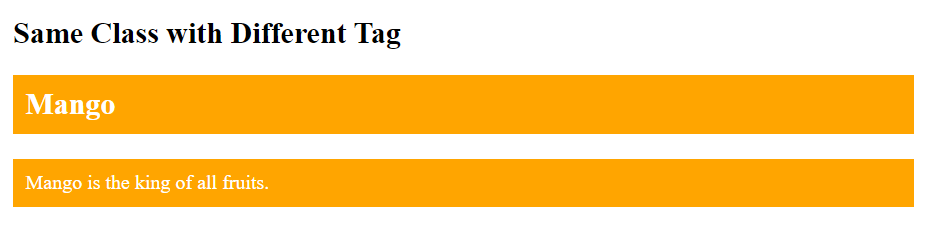
<h2>Same Class with Different Tag</h2>
<h2 class="fruit">Mango</h2>
<p class="fruit">Mango is the king of all fruits.</p>
</body>
</html>
Output:
Class Attribute in JavaScript
You can use JavaScript access elements with a specified class name by using the getElementsByClassName() method.
Example:
Let's hide all the elements with class name "fruit" when the user click on the button.
<!DOCTYPE html>
<html>
	<head>
		<style>
			.note  {
				font-size:  120%;
				color:  red;
			}
		</style>
	</head>
	<body>
		<h2>Class Attribute with JavaScript</h2>
		<p>Click the button, to hide all elements with the class name "fruit", with JavaScript:</p>
		<button onclick="myFunction()">Hide elements</button>
		<h2 class="fruit">Mango</h2>
		<p>Mango is king of all fruits.</p>
		<h2 class="fruit">Orange</h2>
		<p>Oranges are full of Vitamin C.</p>
		<h2 class="fruit">Apple</h2>
		<p>An apple a day, keeps the Doctor away.</p>

		<script>
		function myFunction() {
		  var x = document.getElementsByClassName("fruit");
		  for (var i = 0; i < x.length; i++) {
		    x[i].style.display = "none";
		  }
		}
		</script>
	</body>
</html>